Cool Things to Draw Skulls
The skull is an epitome that we all recognize, as information technology's been seen in endless forms. From horror movies to biology classes and, of grade, the fact that we all have one!
There'south a certain fascination behind the skull, and information technology's also an important symbol in many cultures.
It tin can mean danger, stay abroad or can too be used in many cultural festivals around the world.
Every bit well recognized equally the skull is, information technology can actually be quite an intimidating discipline to draw! If you would like to larn how to depict one, you've come to the right identify for that
We created this easy guide on how to draw a skull in just 8 easy steps to make sure yous'll be cartoon amazing skulls in no time!
What's in this Blog Post
- How to Draw a Skull – Permit'due south get Started!
- Step 1
- Stride two – Adjacent, erase the pencil and draw in the skull
- Step three – Side by side, draw in the cheekbones
- Footstep four – Now draw in the jaw of the skull
- Step 5 – Next y'all will be adding in the offset eye socket
- Step 6 – Now describe in the other eye socket and nose hole
- Stride 7 – Next you lot will be adding in the teeth and final details
- Your Skull Drawing is Consummate!
How to Draw a Skull – Allow's go Started!
Step 1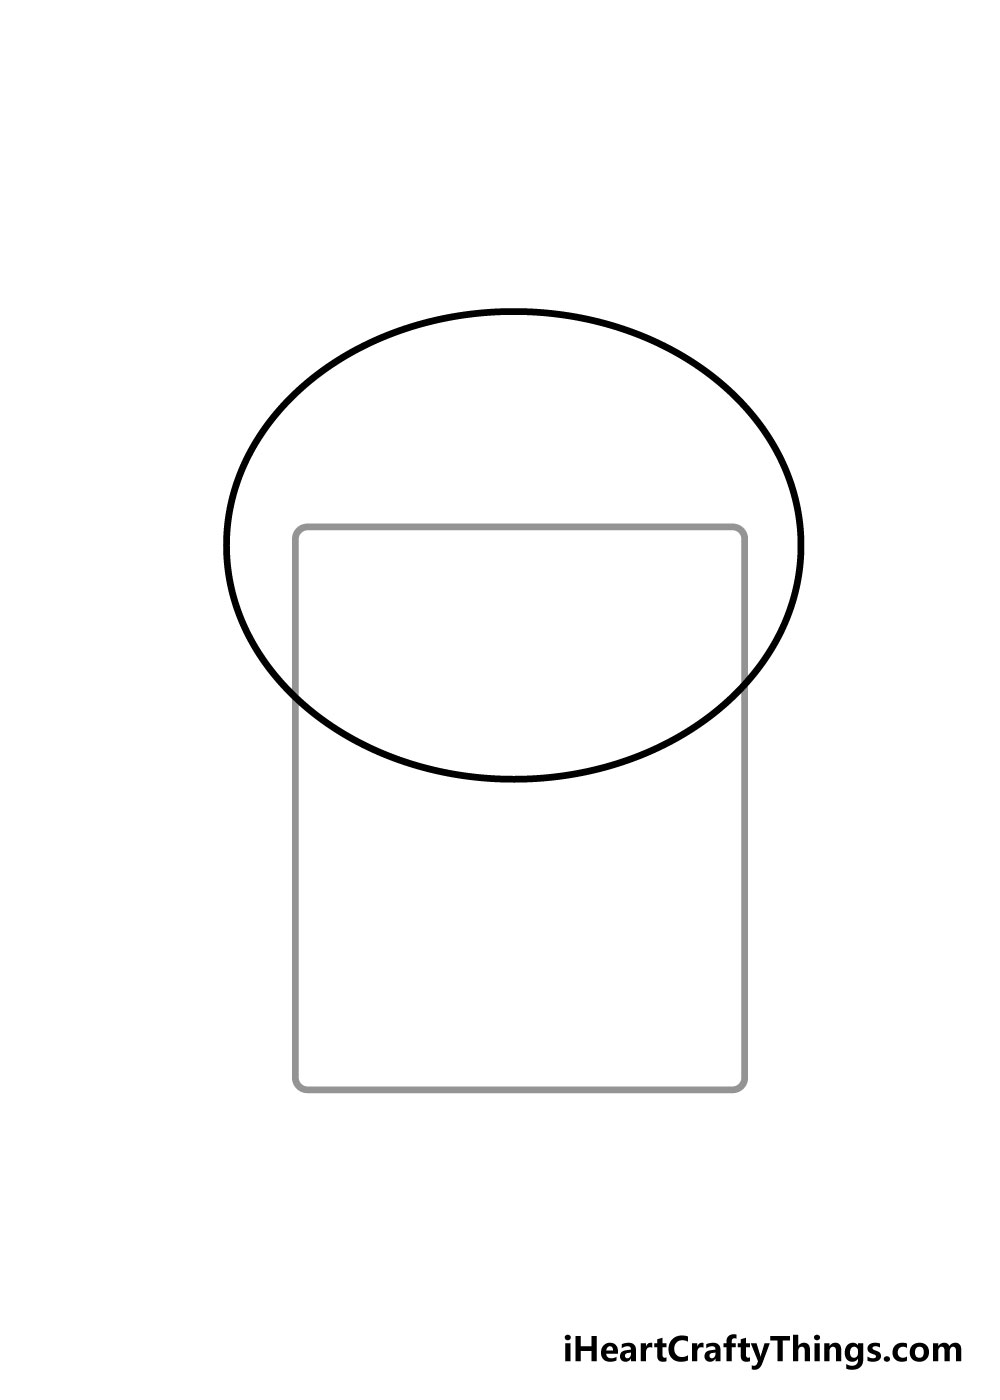
To start off this guide on how to draw a skull, nosotros volition start by drawing a rectangle with a lighter pencil.
We will be using a pencil for now, as this rectangle is to guide y'all and won't be in the final picture.
Side by side, you can draw in an oval shape over the top of the rectangle.
Cartoon an oval tin can exist challenging if done freehand, and so yous could use a drawing tool like a compass to make it easier!
For the oval, you lot should use a pencil for now as well. The reference image we have provided volition serve as a adept visual guide for how it should wait!
Pace ii – Next, erase the pencil and describe in the skull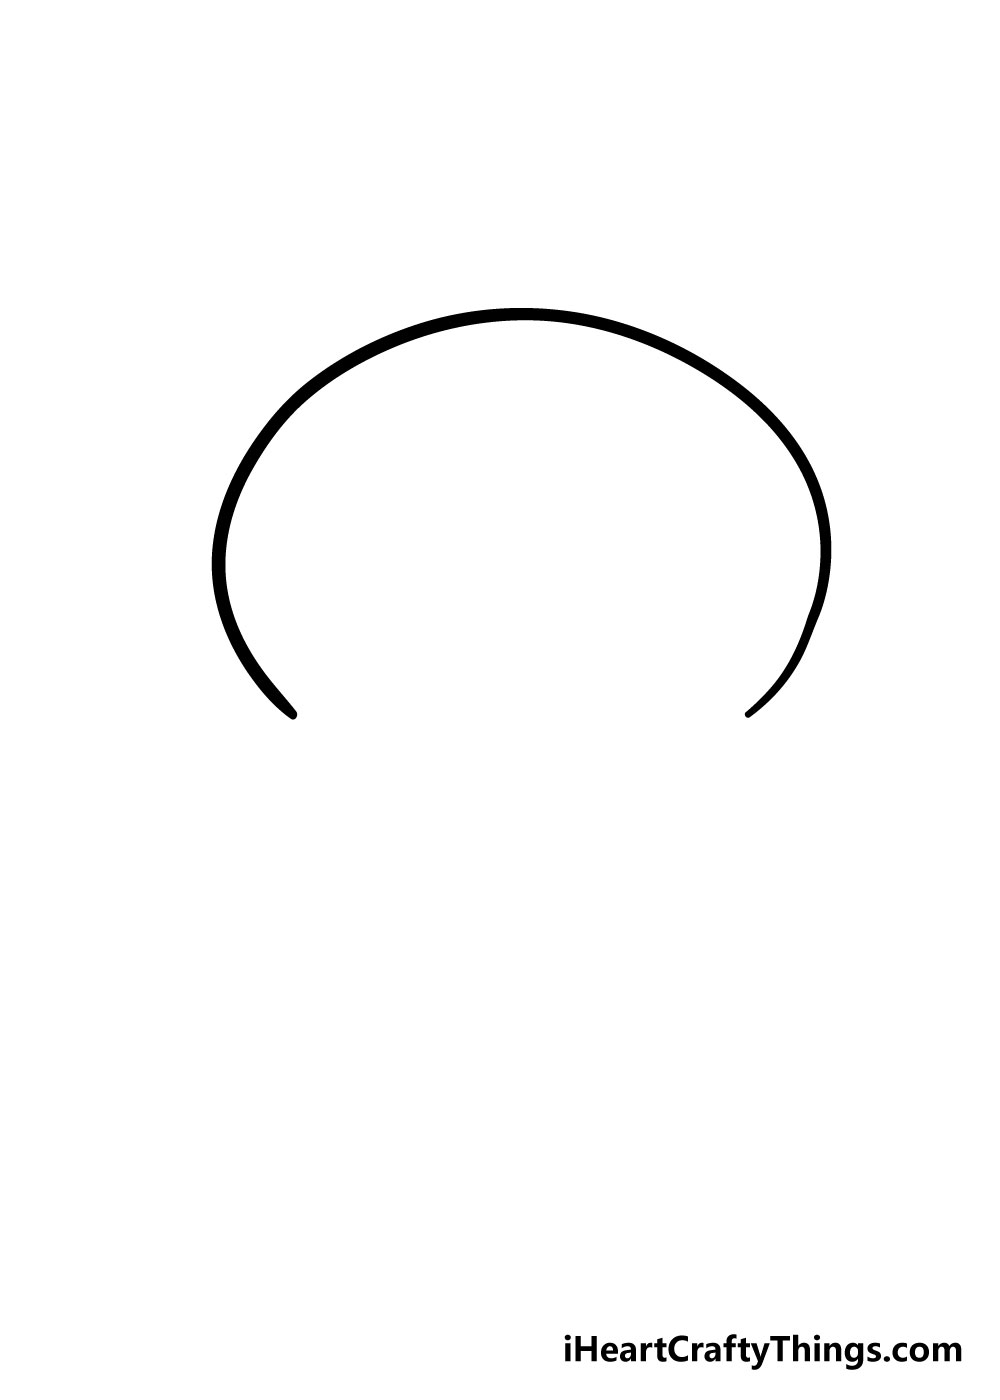
For this side by side step, you should draw over your pencil oval in pen, but only parts that aren't inside the rectangle. Once y'all've fatigued that, you tin can then rub out all of the pencil.
Make sure that you let the pen ink dry properly before you erase or you lot could smudge the ink.
Step 3 – Next, draw in the cheekbones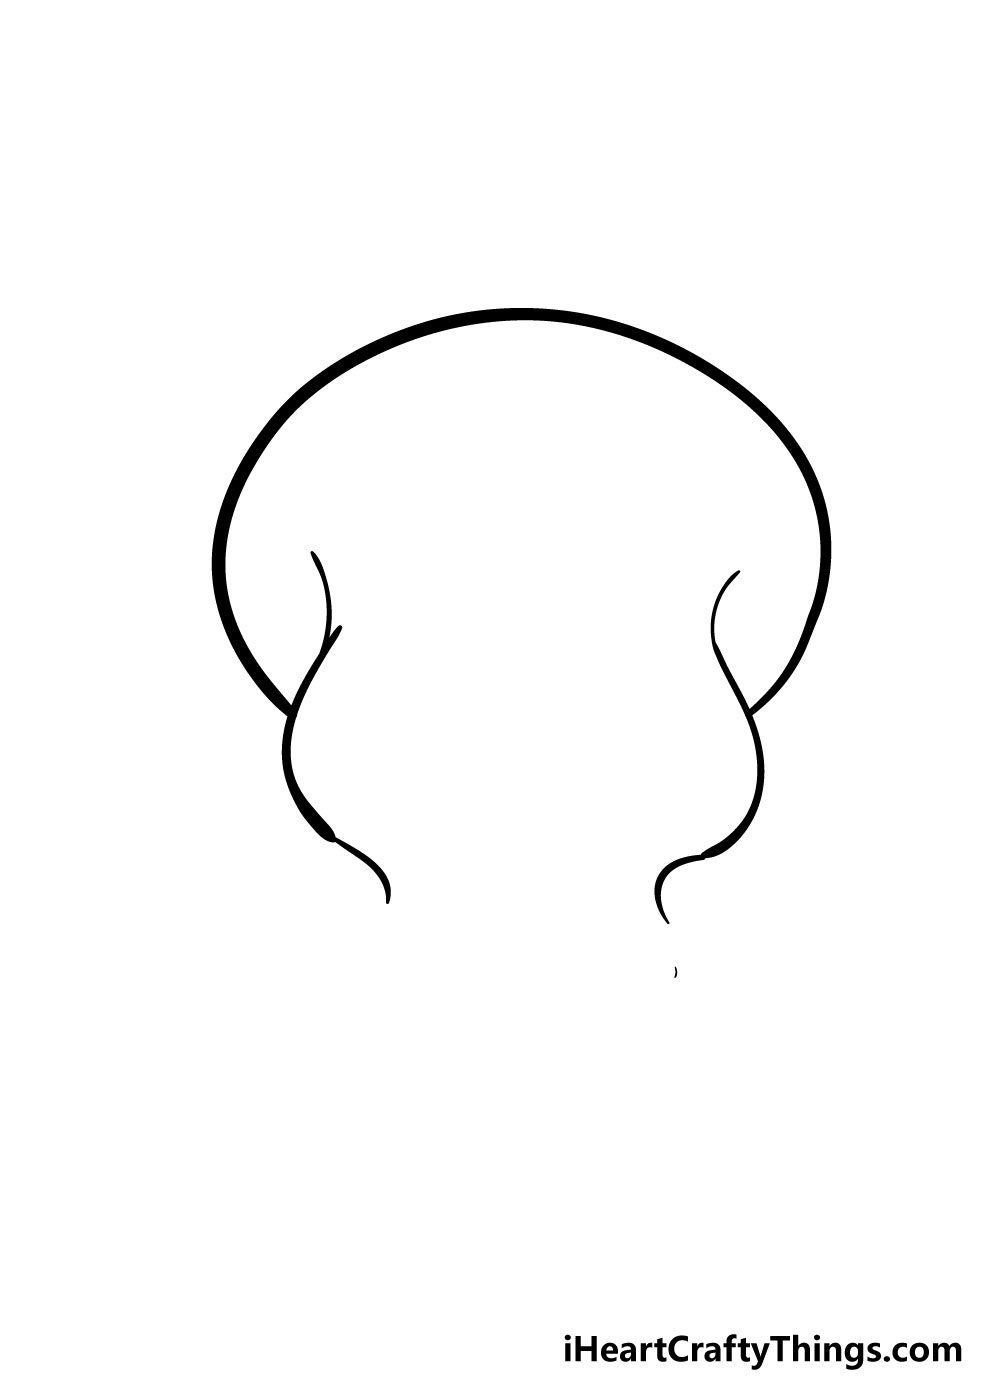
For step three of learning how to draw a skull, we volition be cartoon in the cheekbones. To practise this, you tin draw in two very wavy lines that mirror i another, as you can meet in the image.
If y'all can get them to be around the aforementioned size and shape as one another then that would exist great!
Step 4 – At present draw in the jaw of the skull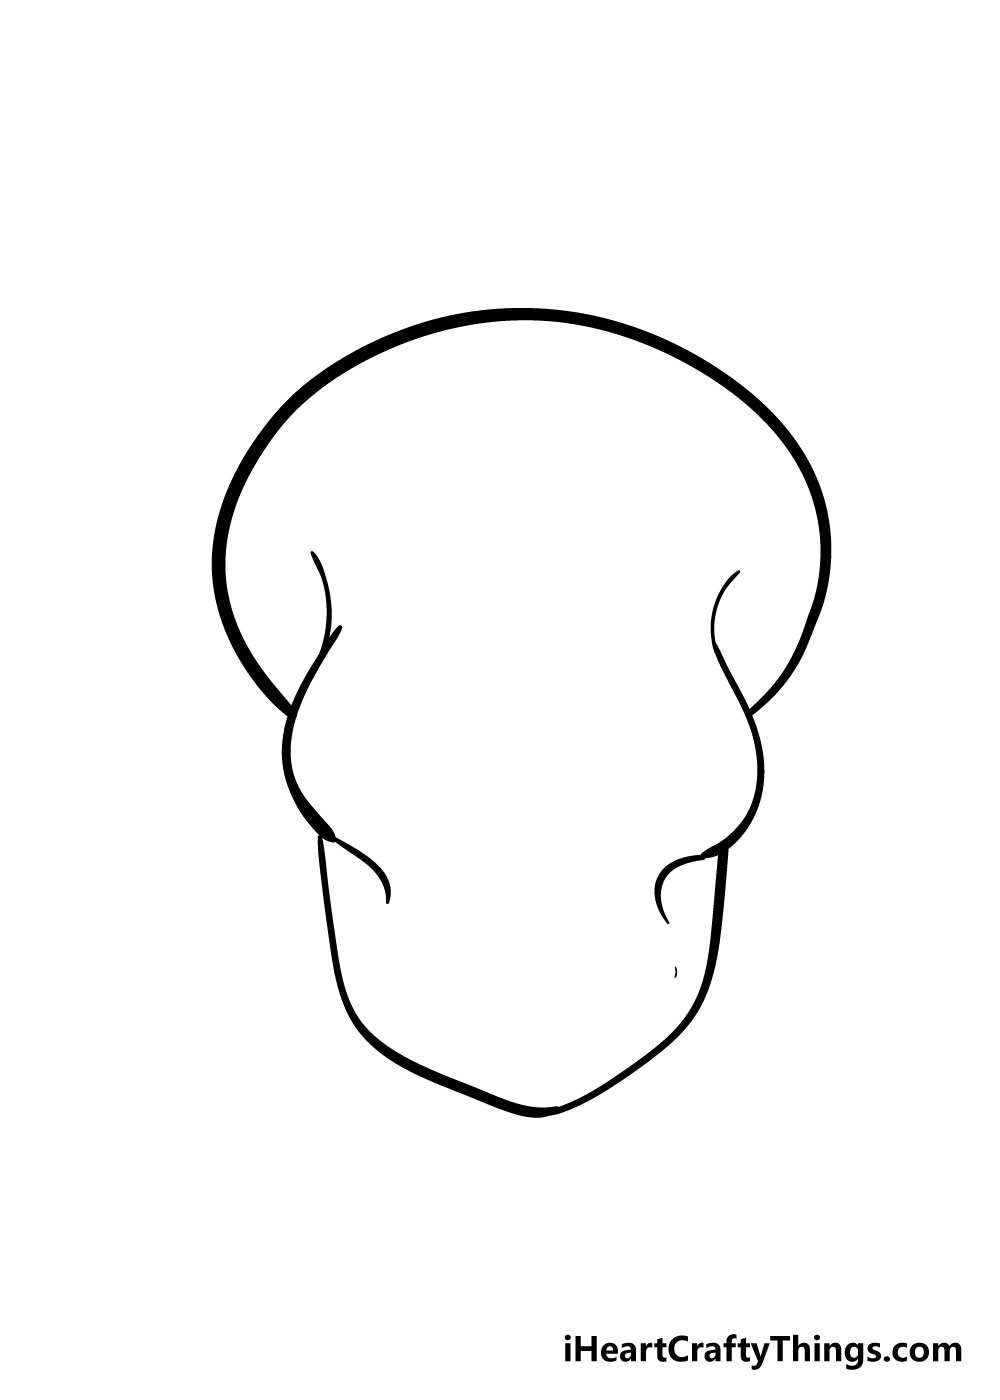
For the next step of your skull cartoon, nosotros will be calculation in the jaw. This will extend from beneath the cheekbones and into the shape they appear in for the reference image.
Using the pic as your guide, it's all-time to avoid having the jaw be too long or too short.
Stride 5 – Adjacent you lot volition exist adding in the start middle socket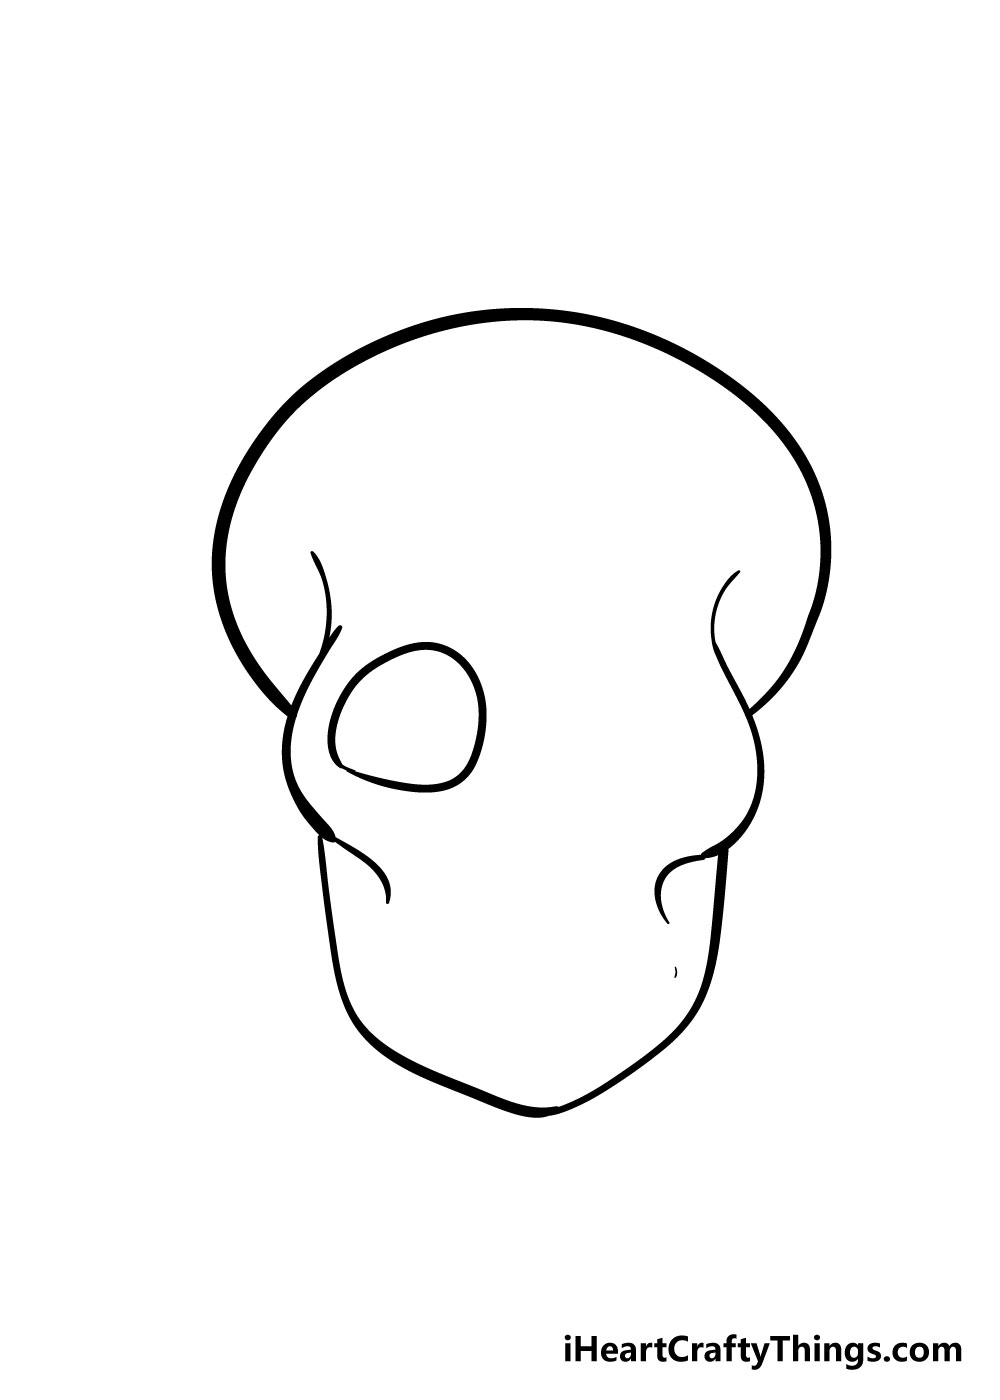
For step 5 in this guide on how to draw a skull, nosotros will be adding the first eye socket.
You can see in the image that this should exist round and flat on the right-hand side and a bit more pointed on the left.
Step 6 – At present draw in the other centre socket and nose hole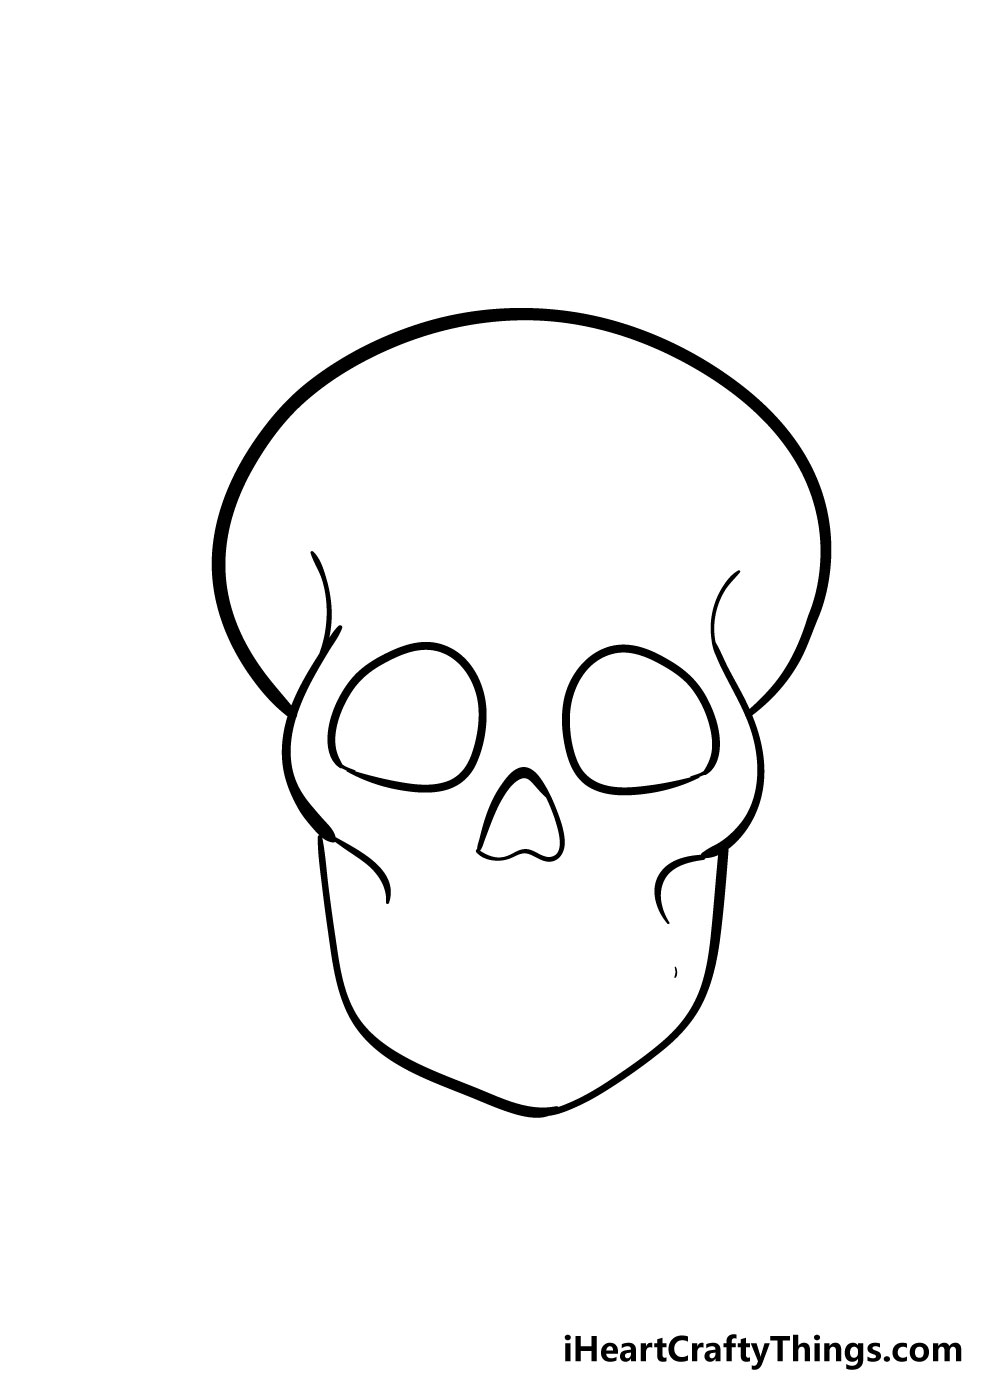
In this next stride, you can depict in a mirror image of the left middle socket you drew in pace 5. The reference paradigm will be your guide on the placement for the other center socket.
Once y'all have both eye sockets, you lot can draw in the nose as it appears in the pic.
Step 7 – Next you lot will be adding in the teeth and concluding details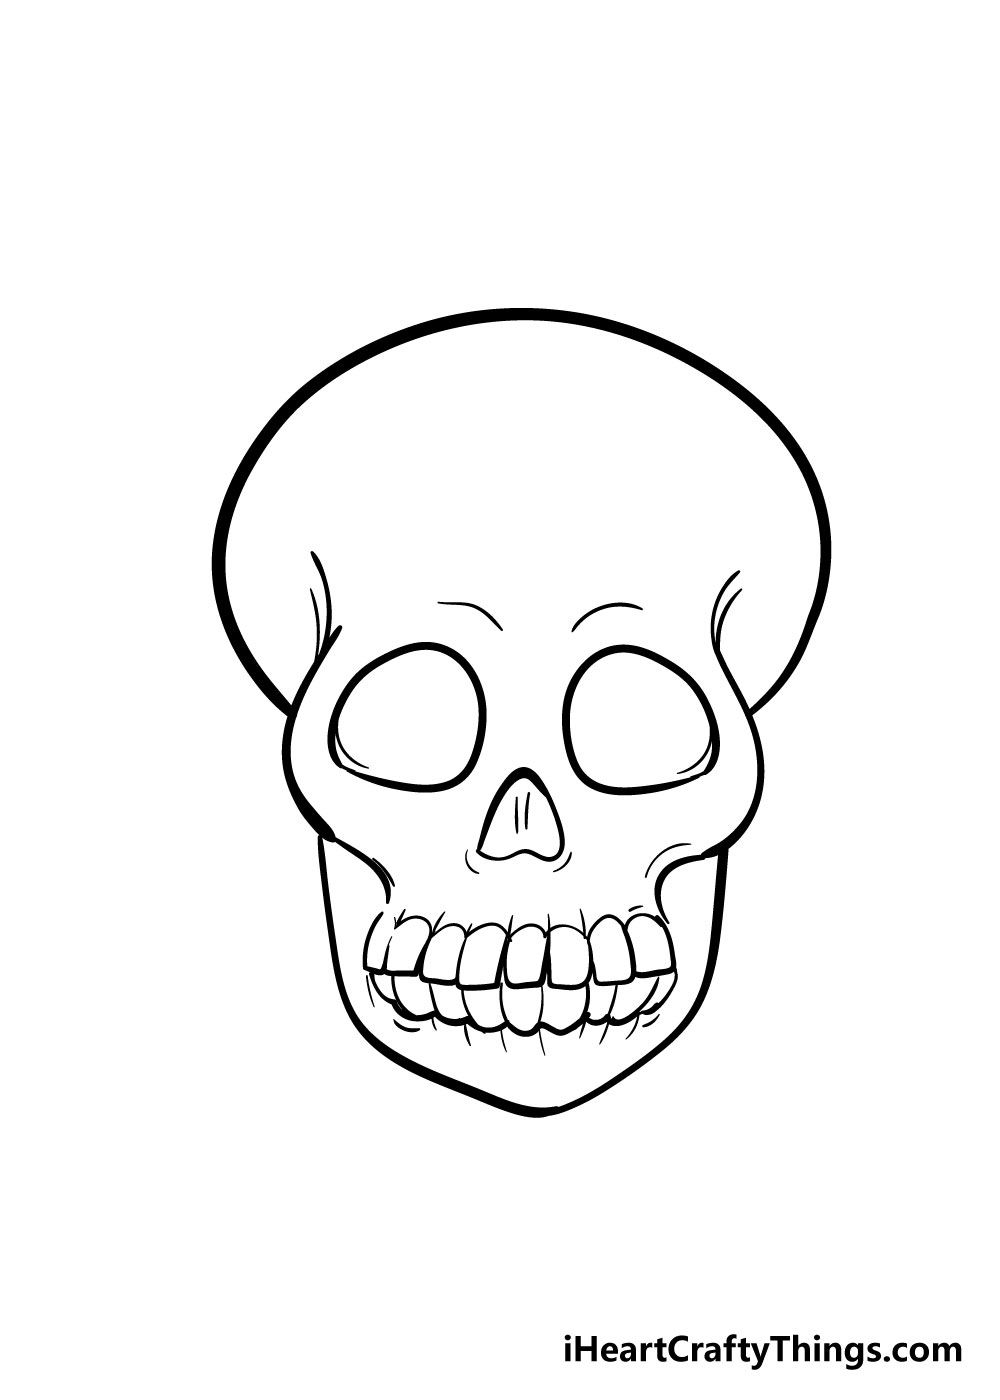
For the final details of your skull drawing, we have one of the trickier aspects of your drawing. Drawing the teeth is a flake more than challenging, but we can brand it easier!
I would use a pencil to depict a curved line that looks like a smiley face to make sure the teeth will be even.
Yous can and then count how many teeth are in the reference image and and then use your pencil to draw some curved lines down onto the guide line you drew.
Once you've got all of the teeth drawn in, you can add in more lines for the details of the teeth as you can encounter in the reference image.
When y'all're happy with the teeth, you should go over them with a pen and and then erase your pencil lines.
In one case that is washed, there are simply a few more line details to add on to the skull, particularly effectually the eyes and the cheeks.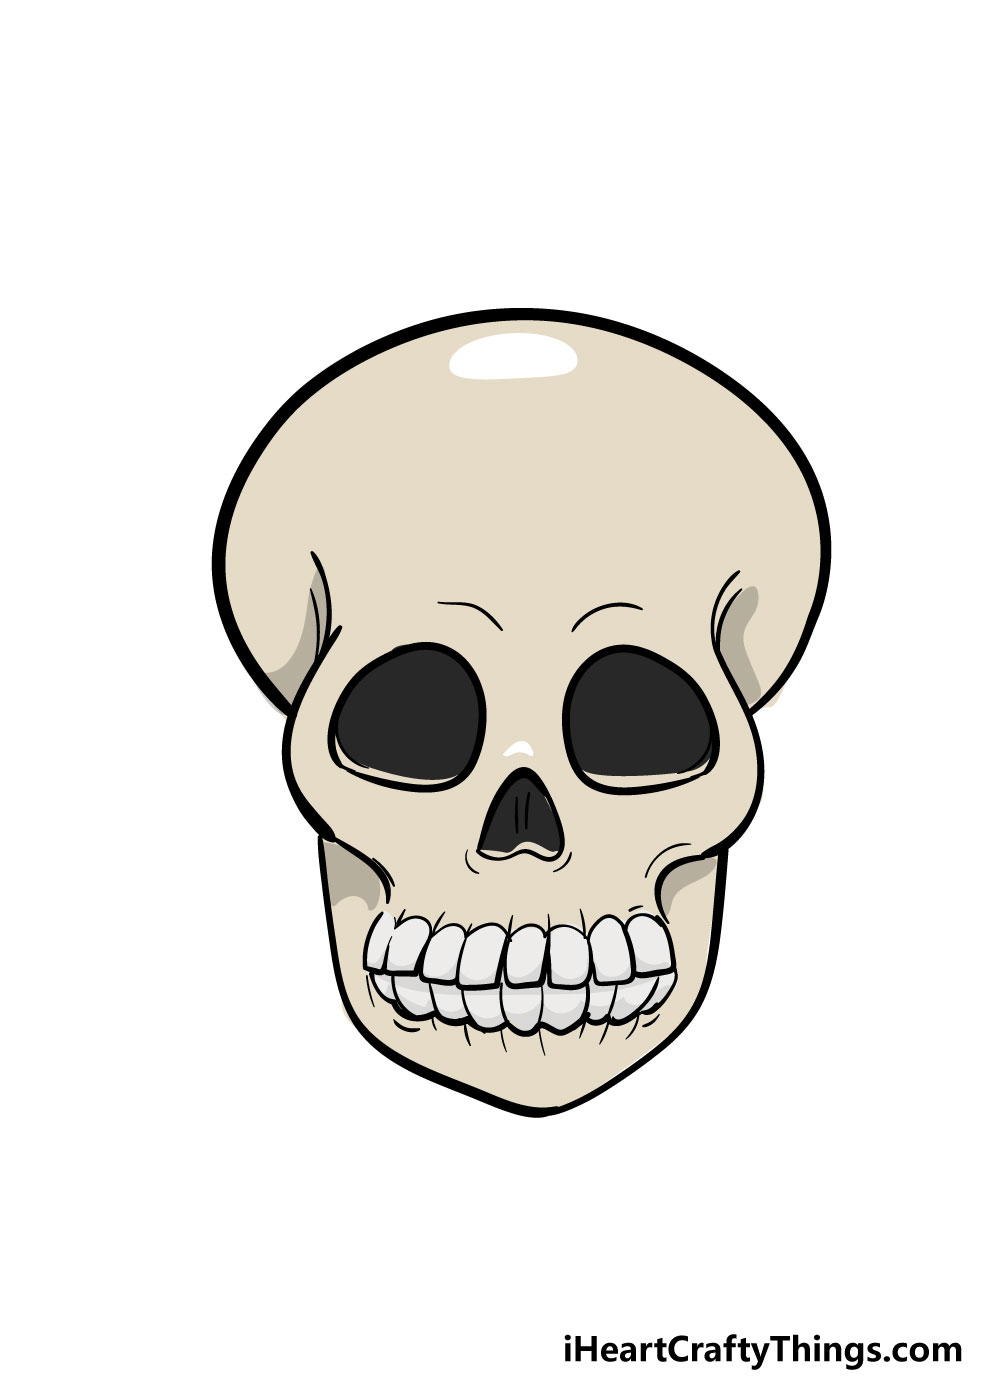
With those final details drawn in, your skull drawing is almost done! The final step is a actually fun one, as y'all'll be filling your skull drawing in with some beautiful colors.
There are lots of ways yous could get near doing this, too. We've shown one fashion you could colour it in, but you should really let your inventiveness flow on this i!
Yous could become for a more realistic look, or you lot could employ some of your favorite bright colors for an amazing look.
If yous're feeling actress artistic, you could describe in some patterns to go far look like a sugar skull.
Y'all can too experiment with different fun art mediums such as acrylic paints, watercolors, colored pens and pencils for some incredible colors!
Your Skull Drawing is Complete!
Now that your skull drawing in is colored, y'all're all finished and you should exist very proud of your amazing artwork!
We actually hope that this guide on how to describe a skull in 8 easy steps was helpful and fun for you to apply.
When you set up out to learn how to draw a skull, information technology may accept seemed like a difficult challenge. Even so, when y'all break it downwardly into smaller, more than manageable steps it tin be and then much easier!
Our aim with this guide was to let you accept fun every bit yous acquire to draw, so nosotros really hope you had a great fourth dimension with it!
Now you can show u.s. how creative you can be with the colors, patterns and mediums you use to stop iff your skull drawings.
Once yous've finished drawing and coloring in your skull drawings, we hope that yous'll share them on our Facebook and Pinterest pages for u.s.a. to admire!
We always love to see your creativity on display and we tin't wait to encounter your awesome skull drawings!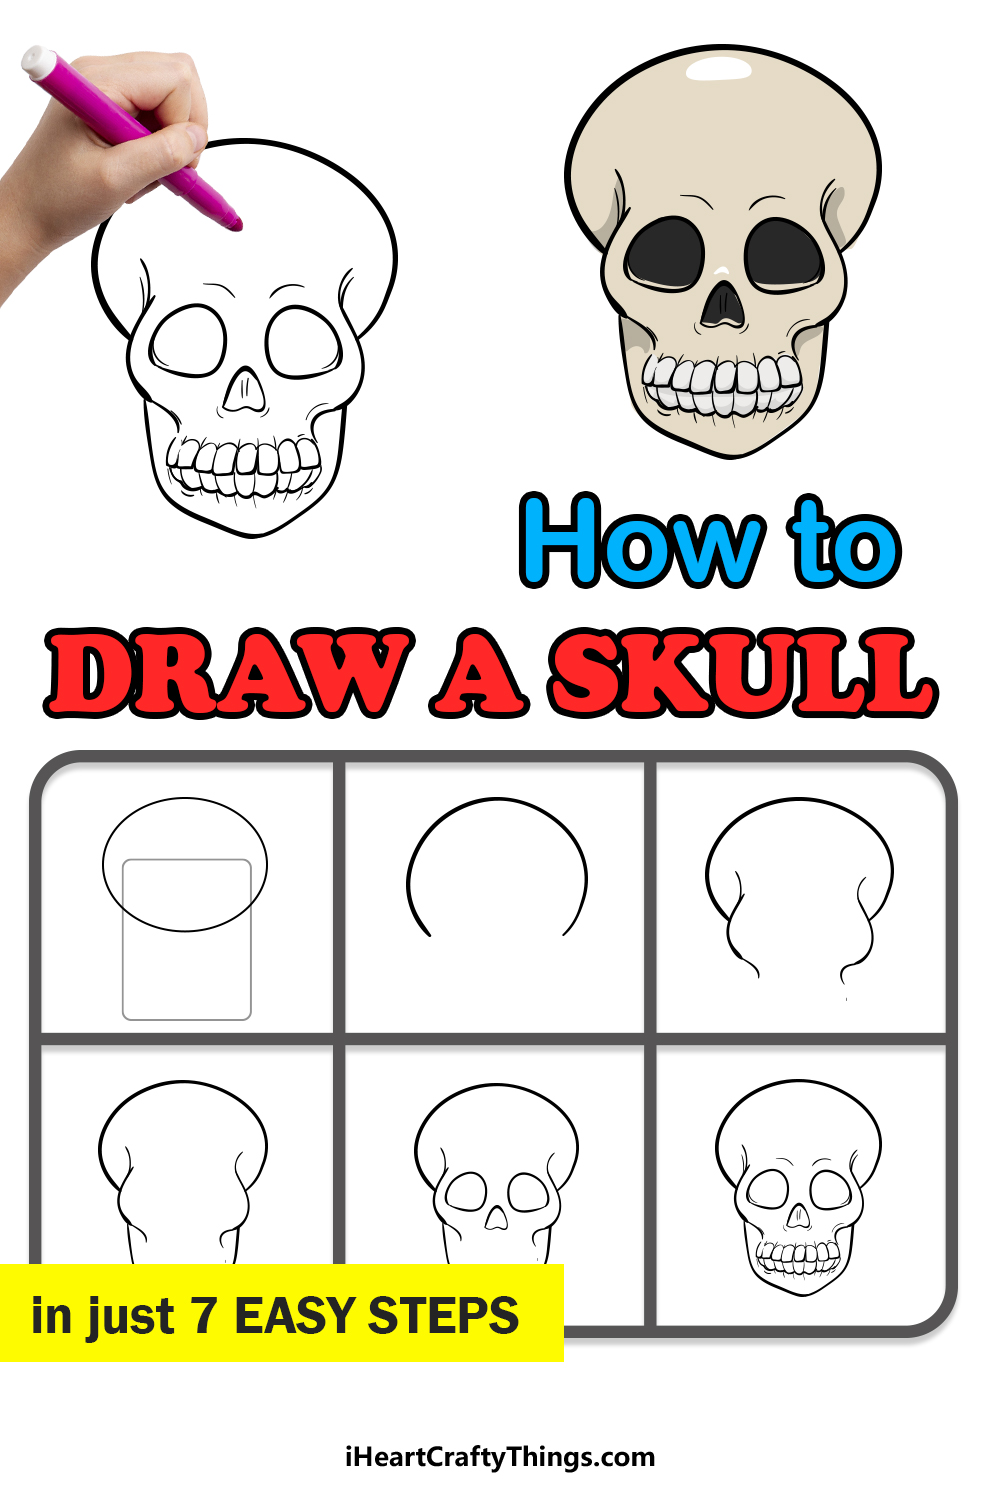
Source: https://iheartcraftythings.com/skull-drawing.html
Post a Comment for "Cool Things to Draw Skulls"